Day Four: Putting It All Together
Day 4 was focused on two things: creating videos and lesson planning. Two very important topics for flipped learning!
Video Creation:
While we
encourage our teachers to create their own flipped learning videos, we
also know that there are some great pre-made video resources available.
We explored sites such as Khan Academy, Math Train, and Sophia.
To help teachers understand why we encourage them to create their own videos, we showed the Katie Gimbar video entitled "Why It Has to Be Me". Katie has been flipping for some time and has a great series of videos and we used several throughout the training. You can access them here.
Teacher created videos help students feel more like they are right
there with the teacher and extends their in class relationship.
While
video creating can get pretty complicated, we encourage teachers to
just do "one take" videos without retakes or a lot of editing. If you
make a mistake in a video students feel like they are in class listening to you live! It helps maintain that student-teacher relationship while at home.
We
looked at different ways to create videos both on teacher laptops and
on the iPads. Many teachers already have PowerPoint presentations they
use for instruction, so the first model was how to create a narrated
screencast of a PPT using the QuickTime 10 screen recording feature. A couple of teachers did this very successfully last year and plan to continue for the coming year. Here is a nice tutorial created by Apple Distinguished Educators on how to do a screen recording in QuickTime 10.
Example QuickTime Screen Recording:
Another
quick way to complete a flip learning video is to use the built-in
camera on a laptop to record yourself presenting a lesson. You can be
writing on a whiteboard or chart paper or modeling a technique for
students. On our Macs we again used QuickTime 10 and the Movie Recording
feature.
The
next two methods we explored were using the iPad camera and utilizing
apps with screencasting features, such as Explain Everything,
Educreations, or ScreenChomp.
After
modeling these different techniques for the teachers, we sent them off
to do a little practicing. they could choose whichever method(s)
appealed to them and give it a go. The ability to take what they had
just been shown and implement it was crucial to beginning to build
confidence in creating their own flip learning videos!
Lesson Planning:
While video
is important we know that what happens the next day in class is the real key to success. That success depends upon thoughtful and reflective lesson planning.
Since we are placing innovative technology into the hands of our students, we also want to ensure those lessons are transformative. Flip Learning teachers were introduced to the SAMR Model. Thinking about SAMR while lessons planning helps increase engagement and utilize higher order thinking skills.
Watch this short SAMR in 120 Seconds video:
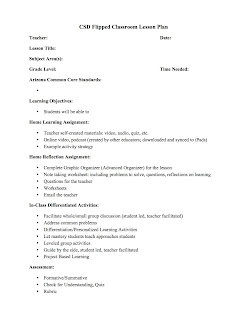
Flip Learning teachers can use their own lesson planning template or this one:
We had lots of fun investigating and testing out these "app"tivities!
Looking forward to seeing how these outstanding teaches implement flipped learning to positively enhance student achievement! Stay Tuned!!


Comments
Post a Comment